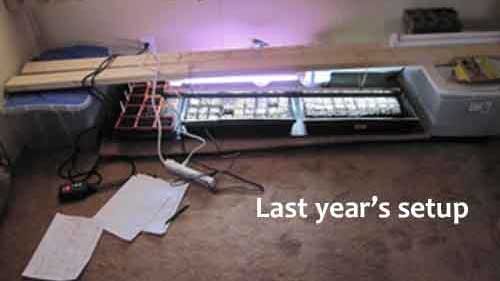
When we bought our new-to-us home, the only place available for our seed starting setup was in the living room on the almost-new deep pile carpet. The seedling setup consisted of two 2x4s balanced atop two empty storage bins, with the lights tied to the 2x4s. No matter how careful we were, potting soil and water ended up on the carpet, so this year it was a top priority to figure out a better solution for starting our seedlings.
Our full unfinished basement was the first choice for this year's new seed starting location, but the thought of carrying all those seedling flats up and down the stairs for several weeks when it comes time to harden off the plants wasn't very appealing. There isn't any sink in the basement so in order to water the seedlings, we'd either have to walk the flats upstairs or slosh the water downstairs. The main floor was a much better location, so a small table was relocated and the seed setup was put in the dining area. It'll be easy to clean up any dirt or water spills from the hardwood floors and it's only 12 feet from the kitchen sink. One big problem was how to set up the grow light fixtures. The basement was easy because of the exposed floor joists, but that's not an option in the dining room so some kind framework was needed for the artificial lights.
The basic setup uses three 2x6 pieces five feet long and two end pieces 22" long, making the frame slightly longer than the heat mat (which is 5-feet long x 21" wide), and the 2x6 pieces are spaced so they end up slightly wider than the heat mat. The shelf underneath is made of three 2x4 pieces five-feet long, and two end pieces 19.25" long (that's the width inside the saw horses). The end pieces are screwed to the 2x lumber to make another platform. The platforms sit on a pair of Stanley folding sawhorses similar to these sawhorses on Amazon.
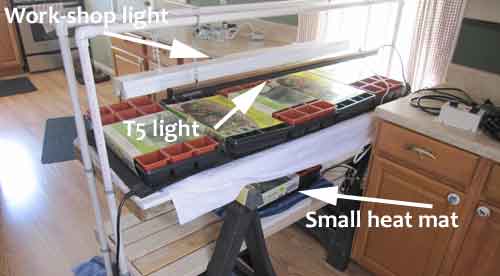
The light stand is made from 3/4" PVC pipe. To determine the height of the four PVC uprights used for hanging the lights, the height of the cell packs, the thickness of the light fixtures, and the length of the light adjuster chains was calculated, then another 12" was added to the height for the seedling growth. The long cross-pieces that the lights are suspended from are about 62" long, and that's pushing it as far as 3/4" PVC pipe strength. The T5 light fixture isn't very heavy but the regular work-shop light is a bit heavy for the 3/4" PVC. It would have been better to use 1" PVC, but 3/4" was on hand. Our setup needs two light fixtures, so there are two PVC frames, but one light fixture might be sufficient for a smaller setup.
It may sound confusing but it's really very easy to build. The image below shows the basic frame sitting on the sawhorses. The towel is underneath the sawhorse to prevent the floor from being scratched in case someone bumps into the frame.

The image below shows the PVC light stand with the lights attached, along with the large heat mat in the upper area and the small heat mat underneath.
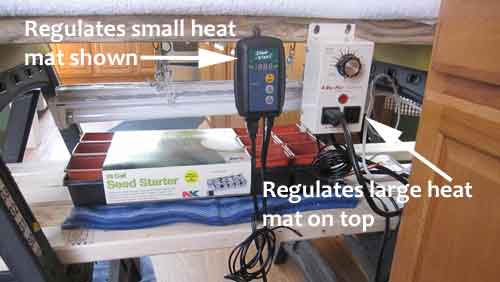
The image below shows both heat mat thermostats mounted to the side of the top platform.
There are five light fixtures and two thermostats, and everything except the large thermostat is controlled using a surge protector. The image below shows the surge protector with the various lights plugged in:

Everything is nice and neat, it's at a good working height, it's easy to keep clean, there's access to water, and there are no cords to trip over. It's so much better than last year!